Your AnswerConnect account comes with free access to the AnswerConnect Mobile App.
So what is the AnswerConnect App? The AnswerConnect App is the portal to your business – a direct line to your team, your live receptionists, and your customers.
Key
- Virtual receptionist – The trained professionals who answer business calls and ChatSupport messages on behalf of your business.
- Business ID – A unique phone number assigned to your account. You can choose your own or have one assigned (with your business’s local area code).
- Client Account Manager (CAM) – Your Support representative for AnswerConnect. When you sign up, you are assigned a specific CAM, who will handle any changes to your account that can’t be made by yourself.
Through the app, you can:
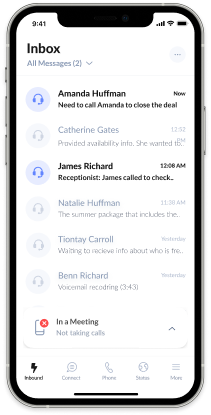
- View the latest messages from your live receptionists and follow up by call or SMS via your Business ID.
- Manage your AnswerConnect account; view and update your plan, business profile, and contact details.
- Manage your status to show your availability. In a meeting or on vacation? Just update your profile to show you’re unavailable to take calls and ensure your calls reach the right person.
- Chat directly with your team and collaborate to manage projects and smash deadlines.
- Contact our support team and give feedback on messages to improve your clients’ answering experience.
To get started, download the app for Mobile iOS and Android
Inbox
What is it?
The Inbox tab contains every interaction between your callers and your live receptionists. From the Inbox, you can:
- View all your messages, set reminders, and add notes to key messages to help your team follow up on the latest opportunities.
- Listen to recordings of phone calls between your receptionists and prospects.
- Forward interactions via email or your carrier SMS to enable your team to quickly follow up on opportunities.
- Call and SMS customers through the Business ID attached to your account
- Give feedback on calls handled by your live receptionists
Add notes.
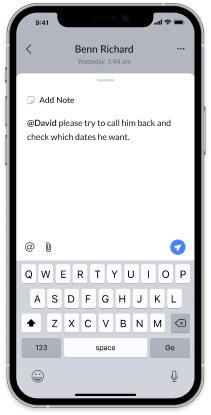
Add quick notes to messages to help your team respond and give context to return callers. Tag people to direct messages to key people.
To tag people in your team,
- Go to the message to which you want to add a note.
- Go to notes and hit the @ button
- Type the name of the person you want to tag
- Hit Send (icon).
Give feedback
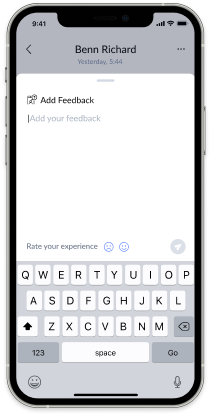
To send feedback on calls:
- Choose the call message.
- Tap More [Symbol – ellipsis]
- Select Give feedback
- Choose if the feedback is positive or negative by selecting the appropriate icon [symbols here]
- Type your feedback in the textbox
- Hit Enter to send feedback to the service team
Call and text
Call and text customers directly through the app. Follow up on new opportunities Anywhere with direct calling from the app via your assigned Business ID.
To call a customer or prospect:
- When a caller leaves a message, you receive an instant notification through the App.
- Simply open the message and select the call button. The call will be made from your assigned Business ID.
- If you haven’t activated a Business ID on your account, the call will be made from your carrier number.
To SMS/text a prospect:
- As soon as one of your callers leaves a message, you will be notified instantly through your App.
- Simply open the message and select the text button. This will open an SMS thread with your customer. The SMS will be sent from your assigned Business ID.
- If you do not have a Business ID, your standard SMS thread will open and the SMS will be sent from your carrier number.
Personalize your service
Keep your live receptionists up-to-date and give return callers a personalized response. By verifying a caller’s contact details, your live receptionists can quickly confirm who they are speaking with and offer a personalized response.
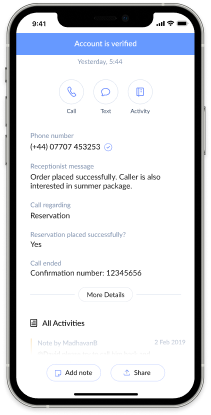
To verify contacts:
When viewing a message from a known customer:
- Go to the saved message.
- Hit the Verify button next to the caller’s name.
Listen back to calls
You can enable call recording through your AnswerConnect Portal or by contacting your CAM.
Hear how your live receptionists are responding to calls and adapt scripts based on real caller conversations.
Once call recording is enabled, you can access recordings when viewing a message within the app.
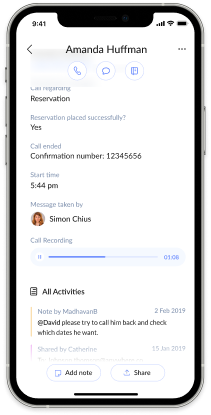
To review recordings of calls:
- Select the message you want to review.
- Go to Call Recording.
- Click Play to hear the message.
Keep everyone in the loop
Update your status to show when you’re free and when you’re unavailable to take calls.
To update your Status:
- Hit the upward arrow to choose your status.
- Choose from:
– Available
– In a meeting
– At lunch
– Vacation
– Custom
To select Vacation, you’ll be asked to specify the duration. Select from:
- Click the ellipsis (symbol) next to Vacation
- Select the length of time you will be unavailable:
– 1 Day
– 2 Day
– Week
– Custom Vacation - Hit Done.
To select a Custom status, you’ll be asked to specify the duration. Select from:
- Until further notice
- For one hour
- For two hours
- Set your own custom time.
Did you know: You can double-tap your status to switch between available and unavailable to show when you’re free to take calls?
Connect
What is it?
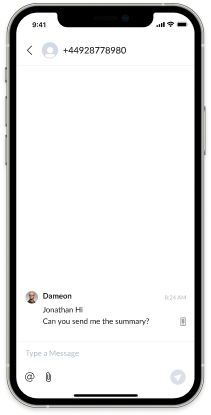
The Connect tab lists all your 1:1 messages with contacts. Send clients an SMS directly through the app using your Business ID.
To send an SMS to a client:
- Hit the Plus button at the top right
- Select New SMS
- Add a new number
or
Click the Plus button to select from your contact list - Type your message and hit Send
One to One Direct Messaging
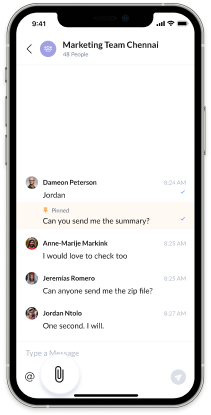
Give your team access to an instant messaging channel and enhance communication with direct 1:1 messaging.
Search your contacts:
- Hit the Plus in the top right corner.
- Select from your list of teammates or type the name of people you want to add in the Search Bar and select their name from the dropdown list.
Don’t see your contact in the dropdown list? You can only connect with other people from your organisation who have access to the app.
Group Chat
Create custom group chats with team members for ongoing projects. Add and remove team members and manage teams, departments and even individual projects through one channel.
To create a new Group, simply:
- Hit the Plus in the top right corner
- Select Create New Group
- Enter the Group Name.
- Select from your list of team members
or - Type the name of the people you want to add
- Select their name from the dropdown list.
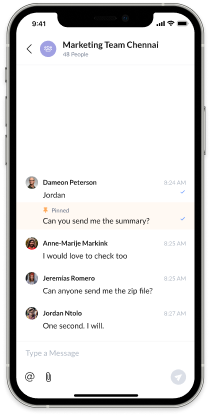
Did you know: You can add other people to the Group after creation?
File management made easy
Send and receive file attachments direct through chats to centralize your resources. Just hit the paper clip to add local files from your computer, or share links directly through the chat.
To attach a file in a Chat:
- Go to the Chat through which you want to send the file
- Hit the paperclip icon beneath the text area
- Choose the file you wish to add
- Hit Enter
Calls
What is it?
Use the Phone tab to contact customers and colleagues on the go.
Verify business line
To use the phone feature in your AnswerConnect app, you must verify your phone number.
1. Log in to the mobile app. You will then be prompted to verify your phone number.
2. After entering your mobile phone number, you will then receive a text message verification code.
3. Enter the verification code. The phone feature is now enabled.
Instant contact
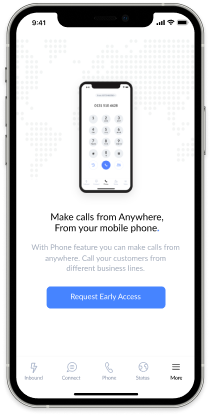
To call customers directly through the Calls tab, you must have a Business ID connected to your account. You can request a Business ID directly through the app. Once a number has been assigned you, there are two ways to call via the calls tab:
- Firstly, you can use the dial pad and simply input any number. Your call will be made directly from your assigned business number.
- Secondly, you can call a customer from your contacts list. Simply select contacts and choose a customer profile to load.
- From their profile, you can click the call button to make a direct call from your Business ID.
Add New Contacts
To add a new contact from your team:
- Select Contacts from your Phone tab
- Select New Contact
- Enter the contact’s details
- Hit Save
Did you know: You can still call from a personal number even if you have a Business ID. Long press the number you want to call. You’ll be prompted to choose the number (ie Business ID or Carrier) from which you wish to dial.
More
What is it?
Customize your AnswerConnect App to suit you. Edit your account details and tailor your profile to keep everyone in the loop.
My profile
From here you can see your contact details, position and contact details.
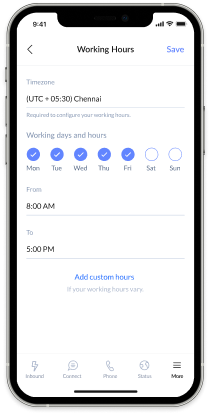
To update your working hours:
- Select My Profile
- Select Working Hours
- Select Edit working hours
- Choose which days of the week you’re available and edit your start and end times.
Settings
Update your notification settings, view terms and conditions, and log out of the App.
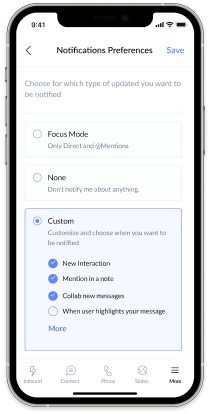
To update your notification settings:
- Go to Notification
- Select from
– All: Receive all notifications
– Focus Mode: Only be notified when you’re directly messaged or tagged in a message
– None: Stop all notifications through your app
Manage Contact
Add new callers, manage existing contacts, and verify contacts to help your live receptionists’ identify return callers.
- Select Manage Contacts
- Select New Contact
- Enter their details
- Hit Save
Did you know: Looking to get some focused time? You can configure your notification preferences to control how and when you receive updates.
Help and Support
Send feedback: Give feedback on the app and any aspects of the service to continually improve your service.
To give feedback:
- Go to Help and Support
- Hit Send Feedback
- Write your comment(s) and hit Send
Report a problem: Experiencing an issue? Report a problem directly to our support team.
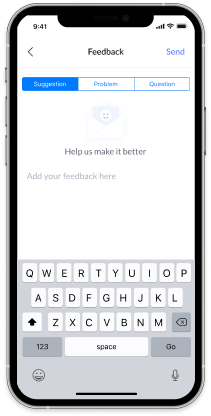
To report a problem:
- Go to Help and Support
- Hit Send Feedback
- Choose Problem and type your feedback in the text box.
- Hit Send.
Secure
The AnswerConnect app is your dedicated portal to your business. Nobody outside of your organization can access this information. The AnswerConnect App comes with several security features to protect your confidential information.
Peer-to-peer encryption: All your chats are encrypted, so all your interactions stay secure.
Secure video calls: With SSL encryption, your video data stays safe.
What is a business ID and do you need one for your business?
A Business ID is a unique phone number provided by AnswerConnect, through which all calls to your virtual receptionists will be directed.
When you first sign up to AnswerConnect, all calls will be directed through your specified business number. To request a new Business ID:
- Go to Calls
- Click Request Early Access
- This will trigger a request to your client account rep.
Your CAM will get in touch with you to confirm the area code you require.
Once confirmed, your CAM will assign the number to you and notify you.
- Log out and log in to your app.
- On login, you will be prompted to verify your password. Enter your mobile number.
- Submit the One-Time-Password. The business line will be activated and you can start making place calls from your mobile app.
Make the most of your mobile app
Now you have access to your account, anywhere. With the AnswerConnect mobile app, you can manage all your opportunities from one place. That means more time to focus on your work and more freedom to grow your business.


